There is definitely a lot of information about man-in-the-middle attacks on the Internet. However, this also means that finding basic and simple tutorials can be tedious. Therefore, with this post I'll try and summarise the main MitM tools for Linux and explain how to perform ARP spoofing with them, being able to capture victim's traffic.
During a man-in-the-middle attack, the attacker secretly acts as a proxy for the communication between two parties. When performing it in LAN (Local Area Network) environments, where the attacker usually shares broadcast domain with the targets, the typical technique used lies in poisoning the ARP cache of the victim(s) and their gateway. Thus, the attacker can capture all the traffic between the victim(s) and the Internet.
ARP is a protocol used for translating IP addresses into MAC ones, allowing physical connected devices to communicate using IP addresses. This protocol doesn't provide any authentication mechanisms, making possible for an attacker to send fake ARP messages (ARP spoofing), so the traffic sent by the victim to a server or gateway is actually transmitted to the attacker. In order to obtain server's response, the other end of the data transmission (gateway or server) must be ARP poisoned too, performing therefore a full-duplex MitM, as opposed to a half-duplex one.
In this way, victim's traffic is sent to the attacker's machine, which has to forward it to the real destination (so the victim doesn't lose connection). Thus, the attacker can see victim's traffic. However, if it is encrypted, being able to decrypt it is highly unfeasible, provided secure protocols are being used (TLS, SSH...). In order to bypass this limitation, an attacker could make the victim's machine establish the encrypted connection with his/hers or the victim could be tricked into using insecure protocols (e.g. HTTP instead of HTTPs with SSLStrip).
Probably, the most common MitM tool is Ettercap, which has been available since 2001. Nevertheless, there are other solutions that implement interesting functionalities, namely BetterCAP or MITMf. This post will be aimed at explaining how to perform ARP spoofing and traffic sniffing with each of the mentioned tools, with no deep analysis of other capabilities.
Ettercap
As I mentioned, Ettercap is the most mature project, so it can be installed from repositories with many Linux distributions. Moreover, is open source and, due to its popularity, there is a great amount of available plugins that increase its capabilities. However, they are written in a specific language, increasing the learning curve.
In order to perform and ARP spoofing attack, the following command can be used (10.0.1.18 is the victim's IP address and 10.0.1.1 the one from the gateway, although, in this scenario, order is not important):
In order to perform and ARP spoofing attack, the following command can be used (10.0.1.18 is the victim's IP address and 10.0.1.1 the one from the gateway, although, in this scenario, order is not important):
ettercap -T -M arp:remote /10.0.1.18// /10.0.1.1//
By default, Ettercap only sniffs traffic between the specified addresses. If we also want to sniff traffic with other end point (e.g. to the Internet) the option remote (arp:remote) must be used. The attack can be also performed in a half-duplex fashion. In this way, we avoid ARP spoofing one of the targets, typically, the gateway.
It is worth noticing, that Ettercap doesn't automatically enable IP forwarding, so we need to manually do so in order to avoid blocking victim's connections (DoS attack).
 |
| By default, Ettercap verbosely shows all sniffed traffic. I don't find this very useful, as it makes more difficult to extract information at a glance. |
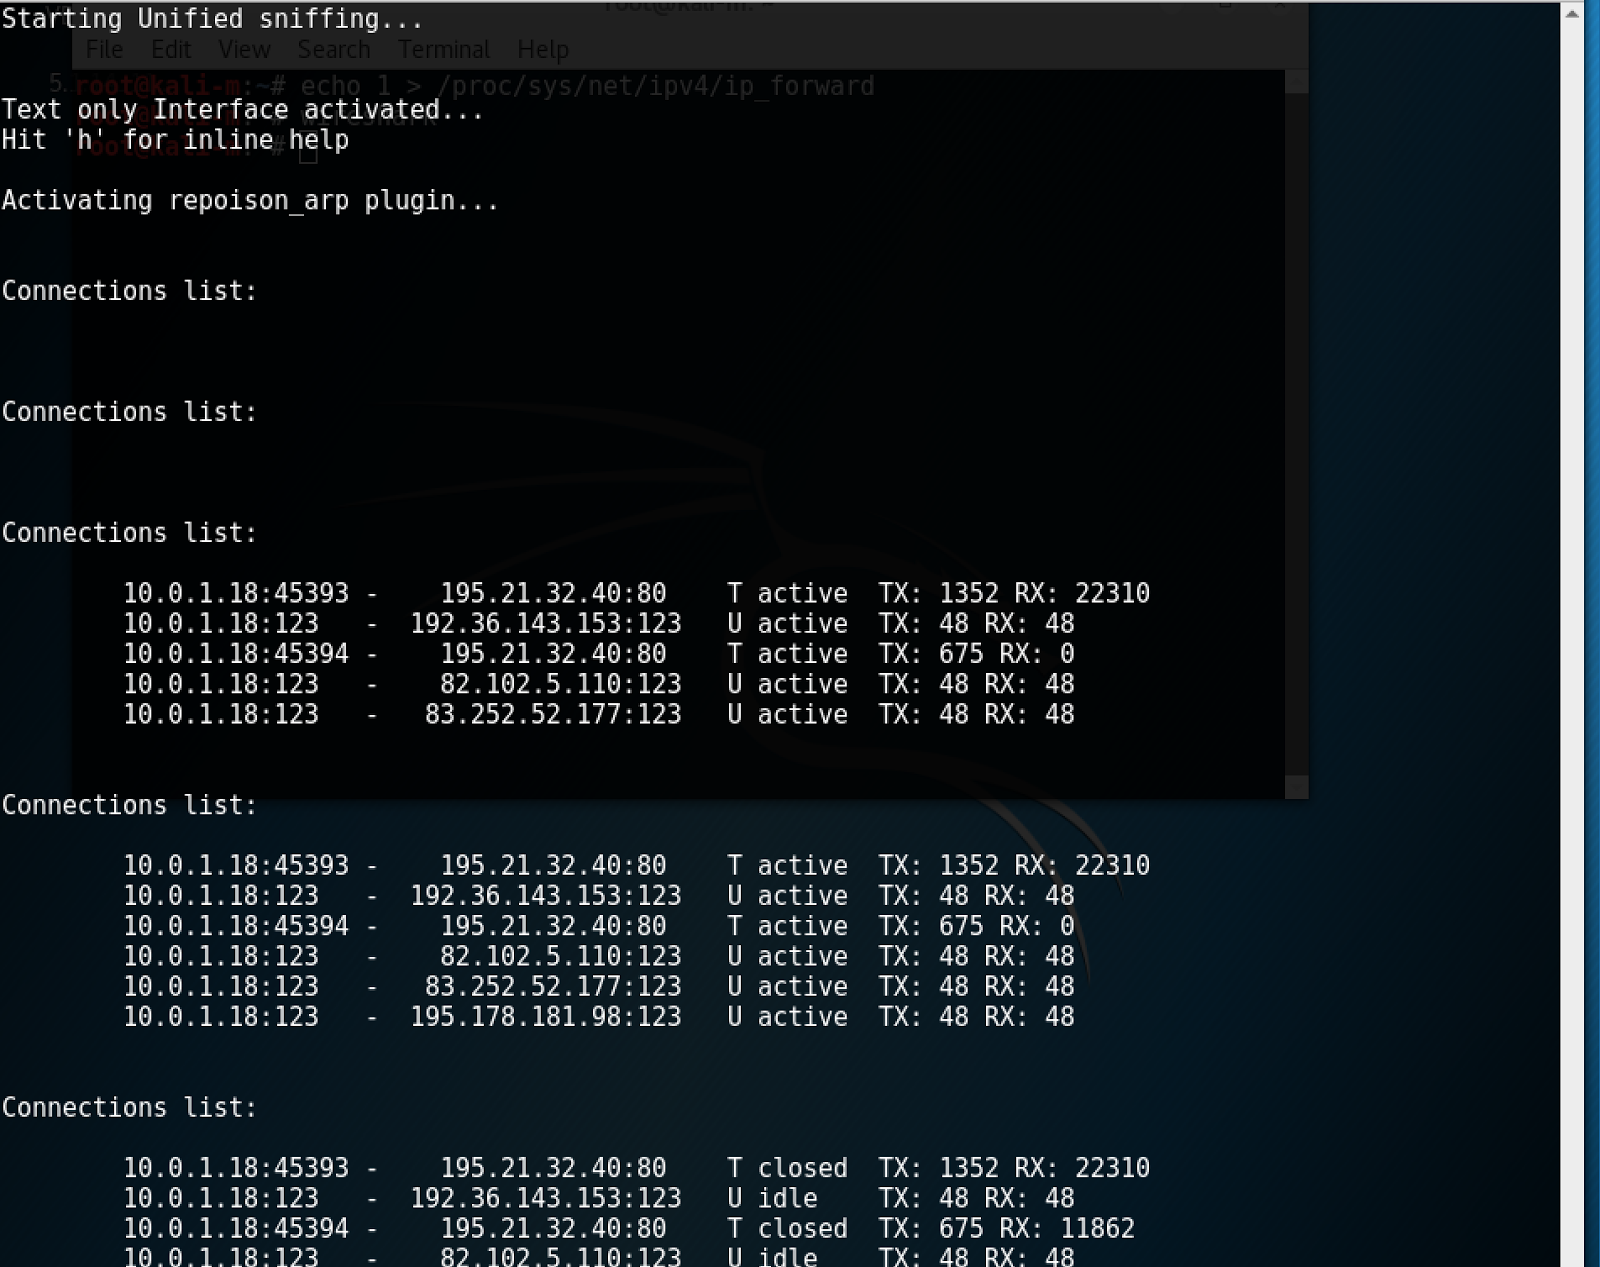 |
| Using the quiet option (-q), Ettercap doesn't show each packet, but we still can check intercepted connections with the C key. |
As shown by the snapshots, Ettercap output is not perfect. However, it is possible to write sniffed traffic to a file (-w option) and open it later with any other tool (e.g. Wireshark).
As shown by the snapshots, Ettercap output is not perfect. However, it is possible to write sniffed traffic to a file (-w option) and open it later with any other tool (e.g. Wireshark).
BetterCAP
In order to address several shortages Ettercap, evilsocket started developing this open source tool. With some Linux distributions like Kali, this tool can be installed from repositories. If you are using another one, you just need to install RubyGems environment and follow the steps available on the official webpage.
Once installed, in order to capture traffic between a victim (10.0.1.18) and the gateway (detected by BetterCAP), we just need to run the command below:
bettercap -T 10.0.1.18 --full-duplex
Once installed, in order to capture traffic between a victim (10.0.1.18) and the gateway (detected by BetterCAP), we just need to run the command below:
bettercap -T 10.0.1.18 --full-duplex
By default, BetterCAP performs the MitM attack in half-duplex mode. If we need traffic in both ways (host to gateway and gateway to host) we need to denote it with the --full-duplex option. Unlike Ettercap, BetterCAP automatically enables IP forwarding, so there is no need of doing it manually.
 |
| BetterCAP sniffing |
BetterCAP shows a more summarised and organised output than Ettercap. It is easier to go through the results, as they are not as verbose. Moreover, if we need a deeper analysis we can save the capture (--sniffer-output option) and analyse it later with tools like Wireshark.
Furthermore, BetterCAP also resolves IP addresses, showing the URL of the resource requested by the user. This is useful for quickly learning which pages the victim is visiting. For HTTPS requests, we can only see the domain name, as the resource address is encrypted.
For this particular case, we can't see the domain that the victim requested (google.es) but we get https://arn09s11-in-f163.1e100.net, which is the result of a reverse DNS query of google.es IP address (e.g. dig -x 172.217.22.163). In any case, I find this output better than the one provided by Ettercap.
MITMf
Firstly, you should know that even if using Kali Linux, the installation procedure is not as straightforward as for BetterCAP. However, it is definitely not rocket science and there is a tutorial available here. However, the command source /usr/bin/virtualenvwrapper.sh didn't work for me using Kali Linux. You just need to find the right location of the script. This can be learnt with the following command:
find / | grep virtualenvwrapper.sh
Once installed, in order to perform an attack like the ones carried out with the other tools, the command shown below can be used (10.0.1.23 is the victim's address and 10.0.1.1 is the gateway's):
./mitmf.py -i eth0 --spoof --arp --target 10.0.1.23 --gateway 10.0.1.1
MITMf output is similar to the one shown by BetterCAP. In addition, it tries to identify victim's browser and OS. On the other hand, BetterCAP output shows HTTPS connections (MITMf doesn't) and the use of colours for results makes reading them easier.
 |
| MITMf output that shows victims connections and basic browser and OS fingerprinting. |
Conclusions
Overall, performing a simple MitM attack can be accomplished with any of the mentioned tools. I prefer BetterCAP output, but MITMf performs basic browser and OS fingerprinting, which can be useful. However, no matter which tool we are using, captured traffic can be written to a file and analysed later. Hence, the quality of the default screen output is not the main reason to choose one tool over the others.
What can indeed be a deciding factor is the suitability for our needs of the extra functionality that each tool includes. For instance, Ettercap is compatible with a large number of plugins, written in its specific language. On the other hand, BetterCAP is compatible with plugins written in any language, as long as the act as a proxy. Moreover, it is by default able to create bogus HTTPS connections, impersonating the real server, or to perform SSLStrip attacks. Finally, MITMf includes a great number of plugins out of the box: traffic injection/modification, SSLStrip+, session hijacking, JavaScript Keylogger...
What can indeed be a deciding factor is the suitability for our needs of the extra functionality that each tool includes. For instance, Ettercap is compatible with a large number of plugins, written in its specific language. On the other hand, BetterCAP is compatible with plugins written in any language, as long as the act as a proxy. Moreover, it is by default able to create bogus HTTPS connections, impersonating the real server, or to perform SSLStrip attacks. Finally, MITMf includes a great number of plugins out of the box: traffic injection/modification, SSLStrip+, session hijacking, JavaScript Keylogger...
In summary, all the mentioned tools provide similar basic capabilities. Thus, the decision of which one to choose should be motivated by the advanced functionalities that are needed for each particular scenario. If you want to learn more about the differences between BetterCAP and MITMf, you can check out this Reddit thread, with comments from the inventors of both tools.
No comments:
Post a Comment